Thursday, July 14, 2011

Tech Tip - Road Trip Readiness


For many of you this is the time in the “riding season” that you have trips planed and are about to leave for one.  There are two areas for getting ready for a trip first and most important is to make sure your bike is ready. Second is to pack your bike safely.
 
The most important part about going on a trip with your motorcycle is to make sure it is ready. Before you leave on a trip you should check over your bike or bring it into one of our service departments to have it looked over. If you bring your bike in to us or look over it yourself this is what needs to be checked. The tires and breaks should be looked and to make sure there is enough life to make the whole trip, that is something that best to be check by your service department. 

Tire pressures should be check before you leave. Before and while you are on the trip you should check all major electrical components like headlight (high and low beam), turn signals (front and rear), brake light and running lights (front and rear).


Second area to get ready for your trip most likely will happen the night before you leave and that is packing your bike. Many of you may bring tools with you. If you do or anything else that is heavy it should be packed at the lowest point possible. For example if you have saddlebags it should be at the bottom of your bags and weight equal is both bags for best handling on the road. Also remember that you are limited on space on your bike so small travel size containers save a lot of space. To help with space management remember you can buy whatever you may run out of and wash your clothes at a laundry mat if you run out of clean clothes.

If you need or think you need tires or brakes or any service before you leave for your trip just stop by one of our service departments and we will be happy to go over what you may need to make your bike safe for your trip. For those of you taking trips on your bike have a safe and wonderful time.

Greg Smith
Service Manager
Fox River Harley Davidson

Thursday, June 30, 2011

Tech Tip - Oil Q&A

Ten Questions & Answers About Motorcycle Oil For Your Harley-Davidson


1.  Why should I use Harley-Davidson Motorcycle oil?
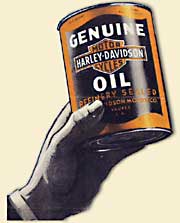
This is the only available motorcycle oil specially developed for Harley-Davidson motorcycle engines.  It is also the only available oil tested for two years by our engineering staff on engine dynamometer stands in Milwaukee and motorcycle track tests at Talladega.  And in other tests, Harley-Davidson has found it to be superior to other oils.
 
 2.  Can I use aviation oils in my Harley-Davidson?
We do not recommend this, because these oils do not contain an important additive that provides good wear protection of the Harley-Davidson engine.
         
 3.  What viscosity grade should I use in my Harley-Davidson?
The recommended viscosity grade for use in all temperatures is SAE 20W50 Harley-Davidson Oil.  The SAE 50 grade is satisfactory in ambient temperatures of 60 deg to 90 deg F, and the SAE 60 grade is appropriate for ambient temperatures above 80 deg to over 100 deg F.

4.  At what temperature will Harley-Davidson Motorcycle Oil break down?
 This oil has been designed for use at temperatures up to 300 deg F for extended periods with no significant breakdown.

5.  What oil temperature is best for my Harley-Davidson?
A good oil operating temperature range is 200 deg to 240 deg F.  Water condensation and acids tend to build up in the oil if the temperature is consistently below 180 deg F, and oil thickness can become marginal at temperatures above 300 deg F.

6.  Does Harley-Davidson Motorcycle Oil do anything besides lubricate engine parts?
Yes.  Besides lubricating engine parts and preventing wear, it protects the engine from rust and corrosion, keeps the inside of the engine clean, cools engine parts and "seals in" combustion pressures, prevents foaming, permits easy starting and quick oil circulation, and reduces friction and power loss.

 7.  Is it true that oil never wears out?
No.  All motor oils wear out.  During normal use, the oil molecules undergo a chemical reaction with oxygen and begin to break down; additives in the oil become depleted; and contaminants like water, gasoline, soot and dust get mixed in with the oil.  Therefore, your motorcycle oil needs to be changed at the interval recommended by Harley-Davidson.

8.  Can I go longer between oil changes if I put in a new oil filter?
No.  The filter keeps the oil free of solid matter, but it doesn't remove water, gasoline or acids.  Also, it can't pinch-hit for additives that become used up.  Follow Harley-Davidson's recommended intervals for oil and oil filter changes, and don't expect a new filter to extend the life of the oil.
 
9.  Is it okay to mix Harley-Davidson Motorcycle Oil with a different brand?
Harley-Davidson Motorcycle oil is compatible with other petroleum oils.  However, mixing with another oil will reduce the superior engine protection of Harley-Davidson oil, so this should be done only when absolutely necessary.

10.  Does it help to put in a can of additive with each oil change?
No!  Just as you wouldn't add sugar to a bottle of soda, you shouldn't use additives with Harley-Davidson Motorcycle oil.  It already contains the right additives in the correct amounts to last between recommended oil changes.  More additives won't help.  In fact, they might upset the oil chemistry and create problems you wouldn't ordinarily have.  Use Harley-Davidson Motorcycle Oil and forget the extra can of additive.  It's money down the drain.

Thursday, June 9, 2011

Tech Tip - Braking

Braking is a crucial skill for every motorcyclist to master. Being able to effectively apply the brakes to slow or stop your motorcycle can provide more stability, especially when cornering at higher speeds.


Front Brake vs. Rear Brake
The front brake systems of most motorcycles are designed to provide the most stopping power, handling as much as 65 to 100 percent of the braking responsibilities. The front brake is best used to provide maximum deceleration at higher speeds. Rear brakes, even those employed on larger touring bikes, only supply 35% of a motorcycle's total stopping power and are designed to assist the front brakes. The rear brakes are best used at slower speeds.
Combined Braking
Most motorcycle safety instructors and courses teach a method employing both brakes. On the street, using a combination of front and rear brakes can offer shorter, better controlled stopping distances. Generally, speeds below 35 mph require an even split between the front and rear brakes, but as speed increases the front brake is required more with decreased assistance from the rear.


Braking and Cornering
Riding a motorcycle into a turn is the purest of joys. Proper braking technique, however, is the key element to navigating any bend in the road. Braking while in a turn is risky, splitting the front wheel's traction between braking and cornering. Brake too hard and the chassis' stability will be interrupted, possibly leading to a low side crash. Proper technique requires all of your braking be done before the bike begins to lean. In practice, find your turning point and brake to set your entrance speed. Release the brake to allow the chassis to settle, and then lean into the turn.

Every rider and every motorcycle reacts differently to every situation. So your best bet is to get to know your bike and how it handles to different braking situations.


Mike J.
Service Manager
City Limits Harley-Davidson

Thursday, May 26, 2011

Tech Tip - Battery Life

When should I replace the battery in my bike?

I've known John since he purchased his Sportster new in 1998.  I haven't seen John in a while due to moves kids, pets and job changes.  So, it was a surprise to see him at the service counter on Monday evening.

It turns out John is looking to sell his bike.  And he needs a battery to get it running.  This time of year, we see a lot of people come in for a replacement battery, and looking at the date codes on the old batteries we get an idea of approximately how long a battery will last in each of the types of bikes (turns out it's usually between 3 and 4 years with good battery care.)

John didn't have his battery with him so I asked him how old his battery was.  Turns out he was replacing his original battery!  That's over eleven years of service out of his original battery.  That's an exceptional life for a battery on a Sportster.  John attributed the long battery life to several things:
  • He always pulls the battery out of the bike during the winter and brings it inside the house
  • He keeps the battery on a Battery Tender battery charger inside the house
  • When he's installing the battery every spring, he uses a corrosion protectant on the terminals
John didn't mention this, but after working on his bike a few times, I know he also tightens the heck out of his battery terminals to be sure the bolts don't come loose.  When the bolts come loose, the connection will arc and build up corrosion on the terminals and cables.  This can make the bike difficult to start and even prevent charging, leading to shortened battery life or even being stranded with a bike that won't start.

While John was at the counter explaining his battery care tips, another rider was nearby and overheard our conversation.  He remarked "I replace the battery in my bike every two years.  I can't afford to be stranded if my battery decides to die on the way to The Roundup or a bike blessing."

So, there you have two extreme opposites of the battery spectrum. John, whose original battery lasted and amazing eleven-plus years, and Earl who replaces the battery in his Street Glide every two years for peace of mind.

Ride Safe.
Chris Hajer

Thursday, May 12, 2011

Tech Tip - Backfiring or Popping on Deceleration

More than likely your engine is "popping" not really backfiring. Backfiring, is extremely rare these days with electronic ignitions and the high reliability of engines. Real backfiring means the engine is not properly timed and the fuel/air mix is getting a spark and ignition at the wrong time (when the intake valve is open). Real backfiring is actually the bike "spitting up" in a sense, backwards through the carburetor or intake.


So, the popping you are hearing is not back-firing. It is a popping resonating sound generated by a lean condition on deceleration. When you suddenly close the throttle, the incoming air is choked off and the closed throttle also causes the bike to return to idle on the very lean idle circuit. However, momentum of the bike is actually "driving" the engine in a sense, and that engine is still spinning at rpm that needs far more gas than the closed throttle position can provide. The engine is still spinning but the incoming fuel rate is very low, until just enough builds up in the combustion chamber to "fire" on the exhaust stroke of the engine.


Don't "change the plugs" like some people suggest, it’s a waste of time and money. Messing with the ignition timing really won't help either, because it is still a lean fuel/air mix on deceleration that is the cause. ( I said cause and not problem, because the popping is not at all damaging to the bike).


 Often people think their bike is not tuned properly after the addition of “aftermarket” mufflers because of the additional popping they hear. Stock mufflers provide a lot of volume for the rumbles and popping in the exhaust to be toned down by resonating in the larger muffler canister. Motorcycle builders also have to meet sound regulations along with emission standards. Some of that sound proofing is in the mufflers. But, aftermarket mufflers that offer easier breathing, and are usually lighter and smaller, don't offer that same volume (Less volume = less sound attenuation = more noise and more popping). Modifying the exhaust (especially if it gets louder) will only make the popping louder. Because most aftermarket pipes produce "lower back pressure", to add to the popping; aftermarket pipes also tend to lower back pressure this will cause the fuel/air mix to lean out. So don’t worry about that popping you sometimes hear and enjoy this year’s riding season.


Tony D.
Service Manager
Wild Fire Harley-Davidson

Thursday, May 5, 2011

Tech Tip - New ride Woes

Tony from Mount Prospect recently brought in his 2002 Sportster XL1200 Custom with just 965 miles on it.  The bike was beautiful; immaculate and nearly brand new.  This bike is new to him, having just purchased it from a friend, and he had a few concerns.
1. "There's a noise like air blowing in the front end of the bike."

That's a pretty odd description of the problem, but at least I know where to look (and listen).  After a couple of minutes of discussion with the customer I determined that the noise goes away when the brakes are applied.  This is good information.  I took the bike for a quick ride, got it up to speed, then turned off the motor.  I heard the noise the customer was describing (I'd describe it like a "shush, shush, shush" from the front end.)  The noise also went away when the front brake was applied.

After verifying that the rotor was not warped (front brake lever did not pulse when applied) and that there was fluid in the master cylinder (the sight glass was dark) I explained that the noise he was hearing was perfectly normal.  It's caused by contact between the brake pads and the rotor.  The brakes on some bikes make an intermittent sound, like this one, and other make more of a constant "shhhhhhhhhhhhhhh" as the wheel turns.  So long as brake function is normal, this noise by itself does not indicate a problem.  Concern addressed.

2.  "Speedometer stopped working."


This one is easy to verify (during the test ride for the front brake noise, I verified that the speedometer was not working.)  The lighting on the speedometer was still working, but the trip odometer and speedometer were not working.  There are only a couple of things that can fail with this system: a) speed sensor at the transmission, or b) the speedometer itself. 

Being a 1200 Custom and subject to the excess vibration in the handlebars, I thought in this case it might be the speedometer, NOT the more common speed sensor.  I removed the seat to get at the connector for the speedometer tester and immediately found the problem.  The wiring from the speed sensor to the speedometer had been disconnected. It looked like someone had recently installed a battery and either moved the connector and it came undone, or unplugged it.  In any case, after putting the connector back together, I was able to verify on another test ride that the speedometer was working.

In the process of looking over the motorcycle to address Tony's concerns, I found and fixed a couple additional problems.

1. Left hand controls were loose.  This was a common problem on the 1200 Customs due to the type of handlebars on the bike and the way they're mounted.  Harley-Davidson even had a recall for the mirrors on this bike due to excessive vibration and mirror breaking.
2.  Top front motor mount bolts were loose.  Sportsters prior to 2004 (non-rubber mounted) were all subject to these bolts loosening up and sometimes even falling out.  Any time there's a lot of stress on a fastener, like this one, it's subject to loosening up.

3.  Throttle cables had too much free play.  This is a maintenance item.  The throttle control needs to have a certain amount of free play to be safe when the handlebars are moved, but the free play in these cables was excessive.

It's interesting to note that the customer knew about two of the concerns, but the other three problems were not mentioned at all.  That's the benefit of bringing your bike in for service.  We have trained technicians with years of experience on all the Harley-Davidson and Buell models. We can quickly and easily diagnose AND repair issues like these, while you wait.

Ride safe!

Chris Hajer
Service Manager
Illinois Harley-Davidson

Thursday, April 28, 2011

Tech Tip - Washing your Bike

If you want motorcycle cleaning tips that will help you clean your motorcycle faster, easier, and without damaging it, here are some tips to help you...


NEVER START WITH A HOT MOTORCYCLE LET IT COOL FIRST 
  
What Motorcycle Cleaning Products You Will Need:

•    Some soft, clean cloths. You'll need some for washing and some that you keep dry for drying and polishing. A dirty rag can scratch the bike.     
•    Wheel cleaner made specifically for wheels
•    Leather conditioner for saddle and any accessories
•    Clean sponges - a dirty sponge can contain dirt which can scratch paint and chrome.
•    Cleaning solution made specifically for motorcycles. Because the cleaners will get on the paint, saddle and chrome, use products that are not going to cause problems with discoloring the finish or "blue" the chrome. When it comes to motorcycle cleaning, many bikers make a mistake of using the wrong motorcycle cleaning products, which can damage your motorcycle.
•    You may want a bucket for mixing solutions. Follow the mixing directions on any supplies. Be sure each product is used properly.
•    Of course, you need a water hose as well.
If you have heavy dirt or have bugs on the fenders, hose down those areas gently from top to bottom first. This will allow them a kind of "pre-soak" to loosen them. Beginning from the top to the bottom, wash gently, using a clean soft cloth or a wash mitt. If your cleaning cloth becomes soiled, do not take the chance of scratching the paint or chrome; change to a clean cloth. If you use a sponge, be absolutely certain no debris gathers in the sponge pores and causes scratches.

Rinse the bike from top to bottom, paying special attention to any areas of extra heavy soil. If the heavily soiled areas do not come clean, you may need to do a little extra cleaning in those areas. Just remember to be gentle. It is far better to wash a spot three times than to rub the area hard and end up with no shine in the paint, dulled chrome or visible scratches.

Check every little place that dirt can hide to be certain you have the motorcycle completely clean. Then begin the final rinse process. Hose the motorcycle from the top down. Then rinse exactly the same way again. Leaving any trace of cleaning products is very bad for the finishes. While rinsing, watch how the water reacts and drains from the bike. If water beads, then a full polish is optional. If the water runs off in sheets and fails to bead at all, you probably need to take the time to perform a full polish job with manufacture-recommended polishes
Use a wheel cleaner and soft rag to completely and thoroughly clean each wheel. Not only does dirt collect on the wheels, but as the brakes are used, dust from the brake pads can get on the wheel and actually cause corrosion because the metals react with one another. Rinse the wheel thoroughly.

Dry your motorcycle off with clean soft rags. This process can best be done in the shade rather than direct sunlight, if possible. This prevents streaking. Check for streaks and if you need to, dampen a spot and dry that area again. Just a few drops of water is all you need to moisten a streaked spot.

Mike Johnson
City Limits Harley-Davidson - Service Manager

Thursday, April 21, 2011

Tech Tip - Best Practices Battery Care

Best Practices that Yield Results
Use a battery tender on motorcycles whenever possible.
Please follow the recommended testing and charging practices

Charging
AGM (Absorbed Glass Mat) sealed batteries are the only type of batteries currently sold by Harley-Davidson. AGM batteries contain a fine fiberglass mat between the plates which absorb and immobilize the electrolytic acid, making them leak resistant. The acid is still available to the plates for fast reaction between the acid and plate material to deliver the required starting current.

NOTE:

 Newer Harley-Davidson chargers are specifically designed to properly charge and maintain Harley-Davidson AGM type batteries and are the recommended charger. They safely charge conventional lead-acid batteries as well. These chargers are available from Harley-Davidson in both 5 bank (Part No. 94607- 98) and 10 bank (Part No. 94608-98) systems. These units charge the battery (red light on), maintain 14.6 volts for the proper period of time (blinking green light), and then automatically cut back to approximately 13.1 volts (steady green light), thereby preventing overcharge and the resultant loss of electrolyte. The older chargers only bring an AGM battery to approximately 60 percent of full charge at the end of the charge sequence (steady green light). This low state of charge can lead to battery damage

Overcharging
AGM type batteries are filled with the proper amount of electrolyte and then sealed. If a charger reaches too high a charge voltage (15 volts or above), the water in the electrolyte will begin to evaporate. This water vapor is released through a special one-way relief valve on the top of the battery case. Since the AGM battery is permanently sealed, the water cannot be replenished and the battery becomes permanently low on electrolyte. A battery in this state develops internal corrosion and insufficient ion flow similar to a typical lead-acid battery that is low on electrolyte. This can result in loss of performance and eventual battery failure. A sealed battery with concave sides is an example of one that has been overcharged and has lost electrolyte. Overcharging is a major cause of sealed battery failure.

Undercharging
If a battery charger does not bring the battery to a full charge, several problems can occur:
• The rated battery capacity will not be reached and the charging system may not bring the battery to a full charge, especially in those instances where customers take short rides or ride slowly with their electrical accessories on.
• If the motorcycle is stored in a cold climate, an undercharged battery can freeze and crack. So if you are going to leave you bike for a prolong period of time make Sure to use the appropriate battery tender Also realize the average battery life if maintained properly is 4 yrs. Again if maintained properly.

Tony D. 
Service Manager
Wild Fire Harley-Davidson

Thursday, April 14, 2011

Tech Tip - Four Great Service Promotions for the Month of April

There are always great things going on at our three dealerships.  But with the deluge of information you receive daily, it's easy to miss our Service message in the noise.  I want to recap some of the Service   promotions we're offering in the month of April at all our dealerships.

  • Free tire installation on any tire purchased at the dealership.   That's right: purchase a tire from us, and we'll install it on your Harley for free.  In most cases, we can install them while you wait, without an appointment.  Be sure to call first to make sure we have your tire in stock.
  • The service department will pick up your motorcycle for free within 35 miles of the store.  With three stores, that means we'll pick up your bike for free if you're anywhere in Chicago, Tinley Park, Mokena, Frankfort, Bolingbrook, Oak Lawn, Palos Hills, Bridgeview, Joliet, Batavia, Geneva, St. Charles, South Elgin, Carpentersville, Barrington, Northbrook, Libertyville: pretty much anywhere in Chicagoland or Northern Illinois and we've got you covered.  Just call to schedule your free pickup and we'll send out one of our professional drivers to bring your bike in for service.
  • If you're looking for a new seat or set of grips, we've got a deal for you.  We'll give you $50 for your old seat, and $20 for your old grips when you buy a new pair.  We'll even install them while you wait.  No need to haul your old parts back home with you, and save money too. Go right now and take a good look at your grips and see if it's time to upgrade them and receive $20 off your purchase.

Tony D. and the Wild Fire Harley Service Team

p.s. If you want to be the first to receive information about events at any of our three dealerships, please be sure to sign up for text alerts on your mobile device.  Simply text get wild to 77577

Thursday, April 7, 2011

Tech Tip - Handlebars

There is a lot of talk these days about custom fitting our motorcycle. This tech tip we are going to talk about handlebar fitment.


Having the right handlebar setup will make a big difference on your riding comfort. When selecting handlebars you should sit on the bike and hold your arms in the position you are most comfortable. Your back should be straight and your arms should slightly bent. There are many different handlebars to choose from - so finding the right one can be difficult. Always remember if you have to reach where your arms are straight out and you back is not straight you will not last long riding in comfort. Some times just moving your handlebar an inch or 2 up or down makes a big difference in comfort. The next time you get on your bike check it out are your arms in the correct position?


Tony D. & the Wild Fire Service Team

Thursday, March 31, 2011

Tech Tip - Spring Riding Checklist

Spring Riding Checklist:
It’s time to get your bike ready to ride.  Here are a few tips from our experts in the service department as we get back on the roads:

Change your oil and filter. 
Temperature changes during the winter months may have introduced water condensation and lessened the protection level.

 
Change your spark plugs. 
A fresh set of spark plugs each season is an inexpensive way to ensure optimum performance.

 
Inspect your tires and air pressure. 
Look for signs of dry rot, as well as punctures and slices in the sidewalls.  Make sure you have plenty of tread.  Now is the time to pull out your Motorcycle Owners Manual and check the recommended tire pressure for your model.  Properly inflated tires not only help the motorcycle operate correctly, but they will keep you safer on the road, as well.  Remember that tire pressure should be adjusted according to the load for one-up or two-up riding

 
Check your lights and signals. 
Visibility is safety, enough said.

 
Check your gear. 
Don’t forget the safety features that you wear!  Inspect rain gear for holes or tears, make sure your face shield is clean and free from scratches or cracks and check that your boots have thick sturdy soles and adequate tread.

Now get out there and RIDE!

Thursday, March 24, 2011

Tech Tip - POWDER COATING the CHORME Alternative

Nothing turns heads more on the street than a well tuned Harley rolling by decked out in chrome.  From fork legs to wheels, mirrors to grips and every bracket in between the appeal of the classic look of chrome plating rarely disappoints.  But there is an alternative, and one that over the past 5 years has really grown in popularity among riders. For good reason, more riders are having parts powder coated.


Differing from normal paint in that powder coating is essentially baked on, it gives riders one of the most economical, long lasting, and color-durable quality finishes available.  The process provides a protective as well as decorative finish.  The powder used is a mixture of finely ground particles of pigment and resin.  The charged particles adhere to the electronically grounded surfaces until heated and fused into a smooth coating in a curing oven.


Powder coated surfaces are more resistant to chipping, scratching, fading and wearing than most other finishes.  Color selection is virtually unlimited with both high and low gloss, metallic and clear finishes. Thanks to the UV resistance of many of the powders, colors stay bright and vibrant longer.  And texture selections range from smooth to a wrinkle or matte finish – matching the Factory's cosmetic motor treatments.


Almost anything you could imagine chrome plated can also be powder coated.  Windshield brackets, headlamp rings, wheels, handlebars..  the list goes on.  Parts that are oxidized, chrome plated or just plain rough looking can be stripped, prepped and coated for a lasting durable finish.  And with the wide array of color options you can get more creative working with powder coating.


The cost of powder coating is often less expensive and the process is more environmentally friendly than the chrome alternative. 


Probably one of the most popular parts we see getting powder coated are exhaust systems.  A high-heat resistant powder coating on exhaust systems will provide a great custom look. A ceramic coating is added to the interior of the headpipes to help retain heat, or an exhaust wrap with also help manage heat.    The benefits to exhaust systems include superior corrosion resistance protection against nicks and rust and prolonged muffler life.

From a cost, durability and creative perspective, powder coating is a great alternative to chrome plating.  So next time you're considering adding chrome to your bike, take a step back and let your imagination ride wild!


Tony D. & the Wild Fire Service team

Thursday, March 17, 2011

Tech Tip - Headlamps

 During nighttime riding, a motorcycle's headlight is often the only available light source. So, proper adjustment of a motorcycle's headlight is a crucial step in ensuring rider safety.  If the headlight is improperly aimed, the rider will not be able to see the road ahead well enough to safely operate the motorcycle. Also, headlamps can loosen or move due to  vibration, allowing the headlight to shift to an ineffective position. Headlight alignment should be checked often, and adjustments or repairs made promptly when needed.


Different styles of headlight are now available through Harley Davidson which can improve your night time vision. New headlights based on light-emitting diodes (LEDs) and high-intensity discharge (HID) technology. Enhancements also are being made to the halogen technology that remains the mainstay of headlight technology. In recent years, motorists have grown increasingly familiar with the bright, almost blue-looking light of HID headlights on high-end models. Instead of a filament, there are two electrodes and a light arc that fills the space between them. This results in a longer lifetime and greater light output. The resulting light is whiter than that of conventional halogen headlights. Until recently, a third alternative in lighting technology – the light emitting diode, or LED – was reserved for non-headlight applications, including interior lights, turn signals and brake lights. LED headlights are costlier than halogen – and about the same, or even more costly, than HID. But on the plus side, they use considerably less energy than the other technologies. LED headlights are about 95 percent more efficient than halogen.


Another advantage of LED headlights in comparison with halogen and HID is that they have longer life. The average lifetime of a halogen headlight is about 1,000 hours. In comparison an HID headlight lasts about 3,000 to 4,000 hours and an LED headlight lasts more than 6,000 hours, which is the lifetime of the average motorcycle. LED headlights also are less yellow than halogen lights, approaching HID in their whiteness and brightness and that should improve driver response times.


Thanks, Tony D. & the Wild Fire Service Team

Friday, March 11, 2011

Tech Tip - Trailer Tips

No one likes to admit it.  After all we 're all riders.  But occasionally the time comes when we need to trailer our bike to an event, the dealer or even during a move.  It's not difficult task, but the downside to incorrectly strapping down your bike can be significant.  It's also one of those jobs where everyone has an opinion on the correct way it should be done.  All your buddies are experts!

Here are a couple tips to successfully securing your bike–during those few times when you can't ride it!
Whether you haul with an enclosed or open trailer, ride a Big Twin or Sportster the principles to secure your bike are the same.

Loading can be the first tricky part. Lowered suspension will often cause the frame to drag on many trailers during loading.  Consider backing up to curb and loading the bike from a higher point to minimize the chances frame drag, or damaging your kickstand spring.


Invest in a good set of tie-downs–Ancra is one of the better brands and are readily available, including at any of our stores.  You will need 4 to completely secure your bike.  In addition, “Soft Hook” loops will make your job a lot easier.  These short, nylon looping straps will make securing around the fairing or close to the frame in the rear much easier and keep the tie-downs from scratching anything.

It is very important to have a solid brace for the front wheel.  The job of the tie-downs will be to pull forward on the bike, holding it tight against the brace.  The brace can be as simple as up against the back of a pick up bed, or a wood “wheel chock” mounted solidly to the floor of the trailer.   There are also many very good production wheel chocks available ranging from $30 - $300.  If you use the trailer more than 3 times a year consider investing in a quality wheel chock.


As a rule of thumb, the angle of the front straps should be parallel to the front forks and outward about 18 inches.  This will give the most stable pull when tightening the tie-downs.  Use solid anchors in the floor like long eye bolts.  Mounts held down with dry wall screws will not work.  When securing the handlebars BE VERY CAREFUL NOT TO loop around any cables.  The tie-down or Soft Hook should be weaved around the cables to simply grab the handlebar.

In the rear, again the straps should pull forward and out, pulling the bike tight against the solid brace in the front.  Use solid mounts like the passenger footrests on Baggers or the swingarm on Softtails.  Don't  use the saddlebags guards on Bagger models.  They will bend.  On Dyna or Sportster models the lower shock mount is a good securing point. In all cases, use of the Soft Hooks will make it much easier to attach the tie-downs.

For bikes with a security system, be sure to leave a set of keys (and FOB) with the bike during transport to prevent the alarm from triggering.  Also when transporting a bike with a fuel valve, be sure to turn the gas off or all the movement will cause the carb overflow to leak.

Never use a cover when hauling a bike on an open trailer.  The wind, grit and buffeting will severely damage your paint and chrome. 


Also be sure to rinse your bike down after hauling on an open trailer. Especially when returning from Daytona.  The salt and debris from the road with corrode cad plated hardware.

Follow these tips,  use good common sense and those few times when you have to trailer will be as painless as possible.  Enjoy the Ride.


Tony D. & the Service Team at Wild Fire H-D

Thursday, March 3, 2011

Tech Tip - Advantages of Correct Tire Inflation

Maintaining correct tire inflation plays a major role in getting the most out of your motorcycle and enjoying the ride to its fullest…
Maintaining correct tire inflation pressure helps optimize tire performance and fuel economy. Correct tire inflation pressure allows riders to experience tire comfort, durability and performance designed to match the needs of their motorcycle. Tire deflection (the tread and sidewall flexing where the tread comes into contact with the road) will remain as originally designed and excessive sidewall flexing and tread squirm will be avoided. Heat buildup will be managed and rolling resistance will be appropriate. Proper tire inflation pressure also stabilizes the tire's structure, blending the tire's responsiveness, traction and handling.


An underinflated tire can't maintain its shape and becomes flatter than intended while in contact with the road. If a motorcycles tires are underinflated by only 6 psi it could lead to tire failure. Additionally, the tire’s tread life could be reduced by as much as 25%. Lower inflation pressure will allow the tire to deflect (bend) more as it rolls. This will build up internal heat, increase rolling resistance and cause a reduction in fuel economy of up to 5%. You would experience a significant loss of steering precision and cornering stability. While 6 psi doesn’t seem excessively low, remember, it usually represents about 20% of the tire’s recommended pressure.

An overinflated tire is stiff and unyielding and the size of its footprint in contact with the road is reduced. If a vehicle's tires are overinflated by 6 psi, they could be damaged more easily when running over potholes or debris in the road. Higher inflated tires cannot isolate road irregularities well, causing them to ride harsher . The pressure must be checked with a quality air gauge as the inflation pressure cannot be accurately estimated through visual inspection.

Your operator’s manual will have all the correct tire pressures for all your different needs in it.


Tony D. & The Wild Fire Service Team

Wednesday, February 23, 2011

Tech Tip - Spring Safety

As the snow melts away, the desire to experience the wind in your face gets stronger. Motorcyclists across the country are charging batteries, checking tire pressure, and putting a good coat of wax on their trusty baby. Making ready for that first warm afternoon, when they can get out on the highway. Harleys or Hondas, all motorcycle riders look forward to the first spring ride in the country We'll assume you prepared your motorcycle properly when you put it in storage for the winter. To make sure your cycle is ready to go, check all fluid levels, check tire pressures, and add some fresh gas. Charge up the battery, and hit the start button. With a well maintained motorcycle, this is about all that's necessary if you did your proper maintenance before winter storage.


The rest of your preparation has a lot to do with attitude. Being safe on the road depends primarily on how alert you are while riding, and how well you are paying attention to what's going on around you.


After a long winter, with road crews working long hours to keep the roads clear of ice and snow, there is a very dangerous residual leftover from the plowing process. That is the SAND the highway department used on roads. Loose sand is everywhere in the early spring corners, intersections, main roads and side streets alike. This accumulation of sand presents a severe danger to all two wheeled vehicles.  People driving cars have forgotten all about motorcycles over the past few months. Even in good weather in the middle of summer a motorcycle is almost invisible to cars. Headlights on can help, so make sure all lights front and back are working properly. When you head out on the road this spring, be aware. Know what's going on around you and give yourself enough space to safely navigate around dangers. Motorcycle riding is one of the best ways to experience what our country has to offer. Be sure you enjoy it safely


Tony D. & The Wild Fire Service Team